Warning
First, this is work in progress, although it shouldn't cause any harm on your device or your installed systems (if you take care of not overwriting it during partitionning, that is), it is still in development, and may not work as you expect.
Second, the kernel shipped comes with the minimum patchset to get the installer running, meaning there is no GPS, GSM, bluetooth, audio or wifi support. If you are already running Debian, although this kernel is cleaner, it is probably not a replacement for your current one.
Third, the installation is long, very long (more than 4 hours, if you select the "standard" and "smartphone" tasks) and you'll need more than 1GiB on your / partition.
Finally, at the time of the writing, almost nothing as made its way to upstream, so, you have to use your own repository with the latest uboot-envtools (from git), modified taksel (apply this patch on an "apt-get source tasksel"), fso-config-gta02) (apply this patch) and kernel (uncompress this archive to overwrite files from an "apt-get source linux-2.6").
Getting the installer
There are two installers available. One is the network-console, which lets you ssh to your FR to do the installation, and the other is the graphical installer, which lets you chose your network settings, but which is probably more RAM-hungry.
You can find pre-built images, for the network-console image and the g-i image, or build them yourself.
Configuring the network
 During the installation, you will need network access, and with the kernel shipped, it's only possible through USB.
So, you will need to do some configuration on the host side.
During the installation, you will need network access, and with the kernel shipped, it's only possible through USB.
So, you will need to do some configuration on the host side.
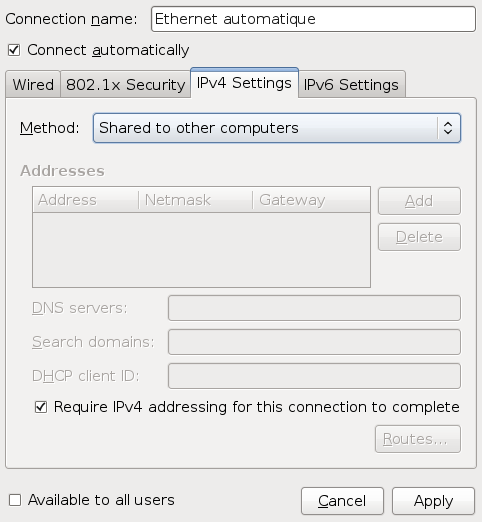
With network-manager, it is quite easy: just add/configure a default ethernet connection, for no specified MAC address, and select "Shared to other computers".
The network-console is configured to fallback to 192.168.42.202 (with 192.168.42.200 as gateway and DNS).
Starting the installer
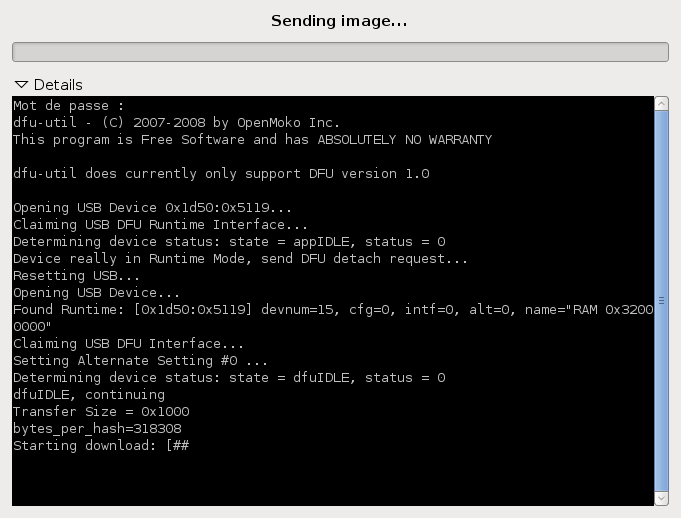
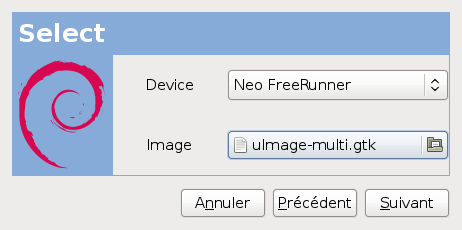 Now that you have the Debian Installer image, you can send upload it to your device and boot it.
In order to do that, you can use the usbboot script or do it manually (more information here).
Now that you have the Debian Installer image, you can send upload it to your device and boot it.
In order to do that, you can use the usbboot script or do it manually (more information here).
Once done, d-i should start.
If you are using the network-console installer, follow the instructions printed on the screen of your FreeRunner, and use "install" for the password.
Installing Debian
Now, the installation procedure shouldn't be very different from what you could have seen on "regular" computer, but make sure to have at least 1GiB for your root partition ("/") before installing the "Smartphone" task.